Windows Cygwin 工具链
该工具链非常轻便,而且容易安装和使用。 它是目前Windows环境下用于PX4开发的最新和最好的工具。
这是官方唯一支持的在Windows环境下开发PX4的工具链(它已经在集成测试系统中经过测试)
该工具链支持:
- 编译/上传 PX4到Nuttx目标(Pixhawk系列飞控)
- JMAVSim/SITL 仿真会获得比其他Windows工具链更好的性能
- 类型校验,轻便安装,完整的命令行支持和许多其他特性
这篇文章将解释怎样下载和使用该环境,并且在需要的时候怎样扩展和更新(比如,使用其他的编译器)。
安装说明
- Download the latest version of the ready-to-use MSI installer from: Github releases or Amazon S3 (fast download).
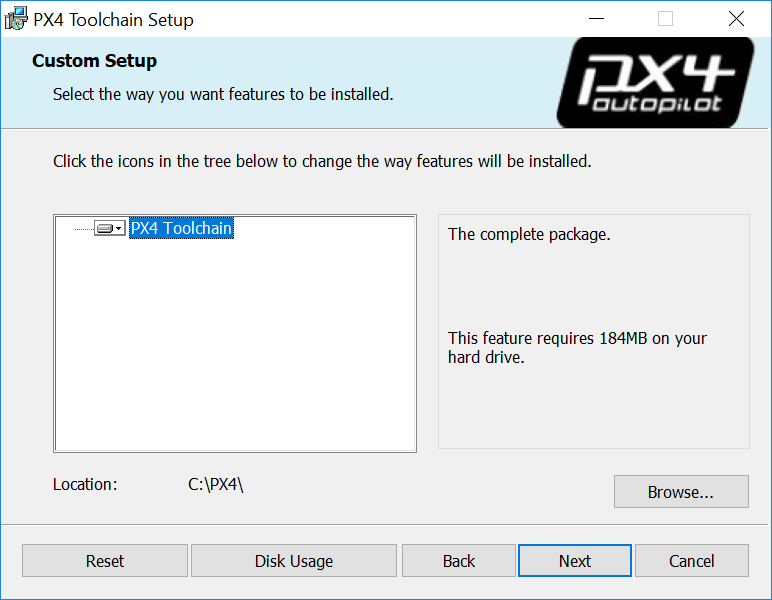
- Run it, choose your desired installation location, let it install:
在安装结束后勾选clone the PX4 repository, build and run simulation with jMAVSim(这简化了你的开始准备工作)
If you missed this step you will need to clone the PX4 Firmware repository manually.
入门指南
工具链使用专门配置的控制台(通过运行run-console.bat脚本)从而可以使用PX4编译命令
- 进入到工具链的安装目录(默认C:\PX4)
- 运行run-console.bat(双击)启动Cygwin bash控制台
在控制台中运行克隆PX4 Firmware仓库命令
只需要克隆一次 如果你在安装程序最后选择了clone the PX4 repository, build and run simulation with jMAVSim,则可以跳过这一步。
 # 克隆 PX4 Firmware 仓库到 home 目录 & 同时并行加载子模块
 git clone --recursive -j8 https://github.com/PX4/Firmware.git
你现在可以使用控制台中的Firmware仓库代码来编译PX4
举例,要运行JMAVSim:
 # 进入Firmware仓库目录
 cd Firmware
 # 使用JMAVSim编译并运行SITL模拟器来验证
 make px4_sitl jmavsim
控制台将会显示:

下面 有关如何生成 PX4 的详细说明 (或参阅下面的部分以了解更多常规用法说明)。
使用说明
安装目录 (默认位置: C:\PX4) 用于开启PX4 SITL(类Linux)命令行窗口的脚本文件: run-console.bat
Manual Setup 部分解释了为什么需要使用该脚本以及它的工作原理。
普遍的工作流程都通过双击 run-console. bat 脚本来手动运行终端命令来启动控制台窗口。
Windows & Git 特殊情况
Windows CR+LF 对比 Unix LF 行结尾
我们建议您所有的代码仓库都强制使用Unix的LF行结尾,并以此运行工具链(并且使用编辑器可以按照此格式保存您所做的修改 - 譬如 Eclipse 或者 VS Code)。 虽然编译以 CR+LF 行为结尾的本地源代码也是可行的, 但 Cygwin在某些情况下(如执行 shell 脚本)仍要求文件以 Unix 行结尾 (否则你会收到类似 $'\r': Command not found. 的错误信息)。 幸运的是, 只需要在代码仓库的根目录执行以下两条命令就可以让 git 自动为你完成此操作:
git config core.autocrlf false
git config core.eol lf
如果需要在多个代码仓库中使用此工具链,,你可以为你的计算机在全局范围内设置这两种配置:
git config --global ...
但我们并不建议这样做, 因为它可能会影响 Windows 计算机上的任何其他 (无关) git 使用。
Unix 执行权限
在 Unix 下, 每个文件的权限中都有一个标志位, 它会告诉操作系统是否允许执行该文件。 Cygwin 下的 git 支持并遵守该标识位 (尽管 Windows 平台的NTFS文件系统并不使用该标志位)。 这一差异通常会导致 git 发现权限中的 "假阳性(false-positive)" 差异。 生成的差异可能如下所示:
diff --git ...
old mode 100644
new mode 100755
我们建议在 windows 平台上全局禁用权该限检查以避免这个问题:
git config --global core.fileMode false # disable execution bit check globally for the machine
对于由局部配置引起此问题的现有存储库,你可以使用如下命令:
git config --unset core.filemode # 移除当前存储库的局部配置,改用全局配置
git submodule foreach --recursive git config --unset core.filemode # 移除所有子模块的局部配置
附加信息
特性/问题
以下已知正常功能 (版本 2.0):
- 使用 jMAVSim 编译和运行 SITL, 其性能明显优于虚拟机 (Cygwin会生成一个本机 windows 二进制文件 px4.exe )。
- 编译和上传 NuttX 二进制文件(例如:px4_fmu-v2 和 px4_fmu-v4)。
- 使用 astyle 进行格式检查 (支持命令:
make format)。 - 命令行自动补全。
- 绿色安装! 安装程序不会影响您的系统和全局路径设置 (它只修改选定的安装目录, 例如 C:\PX4 \ 并使用临时本地路径变量)。
- 安装程序支持更新到最新版本, 同时保持您的个人更改在工具链文件夹中。
补充:
- Simulation: Gazebo and ROS are not supported.
- 仅支持 NuttX 和 JMAVSim/SITL 编译。
- Known problems (Also use to report issues).
Shell 脚本安装
你还可以使用 Github 项目中的 shell 脚本进行开发环境的安装。
- 请确保安装了 Windows Git 。
将代码仓库 https://github.com/PX4/windows-toolchain 克隆到要安装工具链的位置。 打开
Git Bash并执行以下操作,打开后会自动进入默认的安装目录:cd /c/ git clone https://github.com/PX4/windows-toolchain PX4
- 如果要安装所有组件, 请进入到新克隆的代码仓库文件夹, 然后双击位于文件夹
toolchain目录中的脚本install-all-components.bat。 如果您只需要某些组件并希望占用有限的Internet 数据和磁盘空间, 则可以进入到不同的组件文件夹, 如toolchain\cygwin64, 然后单击 install-XXX.bat 脚本以获取特定的内容。 - 继续 入门指南 (或 使用说明 )
手动安装 (对于开发人员)
本节介绍如何在从基于脚本安装目录中通过相应的脚本手动安装 Cygwin 工具链。 使用脚本进行开发环境安装的结果与使用 MSI 安装程序进行安装的结果是一致的。
因为工具链的更新,下述指令可能无法涵盖未来所有更改的每个细节。
- 创建 文件夹 : C:\PX4 \ 、 C:\PX4\toolchain \ 和 C:\PX4\home \
- 从 Cygwin 官方网站 下载 Cygwin 安装程序 文件 official Cygwin website
- 运行下载的安装程序文件
- 在安装向导中选择安装到文件夹中: C:\PX4\toolchain\cygwin64 \
选择安装默认的 Cygwin 基础包和以下附加包的最新可用版本:
目录:安装包名
- Devel:cmake (3.3.2 正常工作无告警, 3.6.2有告警但能够正常工作)
- Devel:gcc-g++
- Devel:gdb
- Devel:git
- Devel:make
- Devel:ninja
- Devel:patch
- Editors:xxd
- Editors:nano (unless you're the vim pro)
- Python:python2
- Python:python2-pip
- Python:python2-numpy
- Python:python2-jinja2
- Python:python2-pyyaml
- Python:python2-cerberus
- Archive:unzip
- Utils:astyle
- Shells:bash-completion
Web:wget
Do not select as many packages as possible which are not on this list, there are some which conflict and break the builds.
That's what cygwin64/install-cygwin-px4.bat does.
Write up or copy the batch scripts
run-console.batandsetup-environment.bat.使用预先准备好的批处理脚本启动开发环境的原因是,这些脚本预配置了程序使用工具链所在目录下的绿色版 Cygwin 环境变量。 This is done by always first calling the script setup-environment.bat and the desired application like the console after that.
The script setup-environment.bat locally sets environmental variables for the workspace root directory
PX4_DIR, all binary locationsPATH, and the home directory of the unix environmentHOME.通过执行 Cygwin 工具链控制台 (双击 run-console.bat ) 脚本, 向安装程序添加必要的 python 包
 pip2 install toml
 pip2 install pyserial
 pip2 install pyulog
> ** 注意 **这就是 [ cygwin64/install-cygwin-pxbat ](https://github.com/MaEtUgR/PX4Toolchain/blob/master/toolchain/cygwin64/install-cygwin-python-packages.bat) 所做的工作。
下载 ARM GCC 编译器 zip 存档,并将内容解压缩到文件夹
C:\PX4\toolchain\gcc-arm。这就是工具链在 gcc-arm/install-gcc-arm.bat 脚本中所做的工作。
安装 JDK
- 下载 Java Development Kit Installer 。
- 因为不幸的是, 没有绿色的归档文件直接包含二进制文件, 所以您必须安装它。
- 查找二进制文件并将其移动/复制到 C:\PX4\toolchain\jdk 。
您可以再次从 Windows 系统中卸载该JDK工具包, 我们只需要工具链的二进制文件。
这就是工具链在 gcc-arm/install-jdk.bat 脚本中所做的工作。
下载 Apache Ant zip 存档, 并将内容解压缩到文件夹
C:\PX4\toolchain\apache-ant。请确保您没有从下载的归档文件内的文件夹中添加其他文件夹层。
这就是工具链在 gcc-arm/install-apache-ant.bat 脚本中所做的工作。
下载、编译并将 genromfs 添加到环境变量:
- 将源代码克隆到文件夹 C:\PX4\toolchain\genromfs\genromfs-src 中,
  cd /c/toolchain/genromfs
  git clone https://github.com/chexum/genromfs.git genromfs-src
- 将源代码克隆到文件夹 C:\PX4\toolchain\genromfs\genromfs-src 中,
使用如下命令进行编译:
  cd genromfs-src
   make all
将包含有生成的二进制 genromfs.exe 的文件夹复制到: C:\PX4\toolchain\genromfs
这就是工具链在 gcc-arm/install-genromfs.bat 脚本中所做的工作。
Make sure all the binary folders of all the installed components are correctly listed in the
PATHvariable configured by setup-environment.bat.